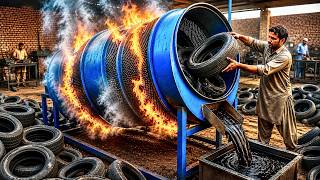
Making tub | Used old and Scrap tire Recycled and Make a water bath tub with Amazing technique
Audio Brief
Show transcript
This episode explores a resourceful method for upcycling heavy-duty tires into durable agricultural water tubs.
There are three key takeaways from this demonstration. First, the project relies on a specific inversion technique where the tire is flipped inside out. Second, the water-tight seal is achieved purely through mechanical fastening rather than adhesives. And third, the entire process emphasizes accessibility, requiring only basic hand tools and discarded materials.
The core of this craftsmanship lies in the physical manipulation of the rubber. After cutting away one sidewall with a sharp, curved knife, the craftsman uses leverage and body weight to invert the tire. This exposes the smooth interior and creates structural tension. To transform this ring into a container, a separate rubber sheet is attached to the bottom using nails spaced incredibly closely together. This high-density nailing creates enough compression to form a leak-proof seal without any glue or chemical sealants.
Ultimately, this tutorial proves that high-value farm equipment can be manufactured manually from scrap in under ten minutes.
Episode Overview
- Resourcefulness and Upcycling: This video demonstrates a practical method for repurposing discarded heavy-duty tires into durable, leak-proof water tubs, highlighting a sustainable approach to waste management.
- Step-by-Step Craftsmanship: The tutorial guides viewers through the entire manual process, from selecting the right tire to cutting, inverting, and sealing it using basic hand tools.
- Cost-Effective Solution: By using scrap materials and manual labor, the video shows how to create agricultural or storage containers that would otherwise cost significant money, offering a high-value DIY project for farmers or gardeners.
Key Concepts
- The Inversion Technique: The most critical concept in this process is "inverting" the tire. After cutting one sidewall, the tire must be flipped inside out. This exposes the smoother interior surface for the tub and creates natural tension that helps maintain the tub's shape and structural integrity.
- Material Selection and Preparation: Not all tires are suitable; the craftsman selects a large, heavy-duty tire (likely from a truck or tractor) which provides the necessary depth and wall thickness. The preparation involves precise cutting of the sidewall to create an open rim.
- Mechanical Sealing without Adhesives: Unlike many modern waterproofing methods that rely on glues or sealants, this traditional method uses mechanical fastening. A separate rubber sheet is nailed closely and densely around the rim of the inverted tire to create the bottom. The compression from the nails and the rubber-to-rubber contact creates the water-tight seal.
Quotes
- At 0:02 - "Stop throwing away old tires. This dirty useless tire lying here can actually save you 15 to 20 dollars and turn into a super strong leak proof water tub that lasts for years." - explaining the economic and practical value proposition of the project immediately.
- At 0:15 - "With just a simple curve knife in my hand I'm slicing it open turning pure trash into real treasure." - highlighting that specialized power tools aren't necessary for this specific upcycling method, making it accessible to many.
- At 0:22 - "In just 8 minutes you get a tough durable leak proof water tub that won't disappoint." - emphasizing the speed and efficiency of the process once the technique is mastered.
Takeaways
- Utilize specific cutting tools for rubber: When attempting this project, ensure you use a sharp, curved knife and keep the rubber wet (as seen in the video) to reduce friction and make slicing through the thick sidewalls manageable and safe.
- Master the leverage technique for inversion: The physical flipping of the tire is the hardest part; observe the craftsman's use of foot leverage and body weight to turn the tire inside out, rather than relying solely on arm strength.
- Prioritize nail density for waterproofing: When attaching the bottom rubber sheet, space your nails very closely together (almost touching) around the entire circumference to ensure a seal that can hold standing water without leaking.
More from Hard Work and Skills
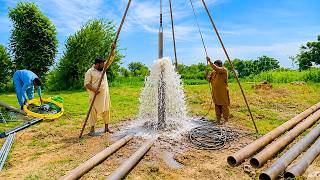
How Do They Find Water Without a Drilling Machine?
Jun 13, 2026
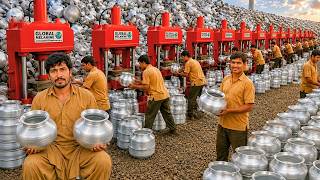
Inside the Factory Turning Tons of Aluminum Scrap Into New Cooking Pots
Jun 07, 2026
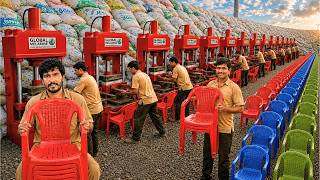
Top 5 Most Amazing Recycling & Manufacturing Processes in Factories
May 24, 2026
Top 5 Most Satisfying Recycling and Manufacturing Process Videos | How to Make
May 23, 2026